anchor

All posts tagged anchor

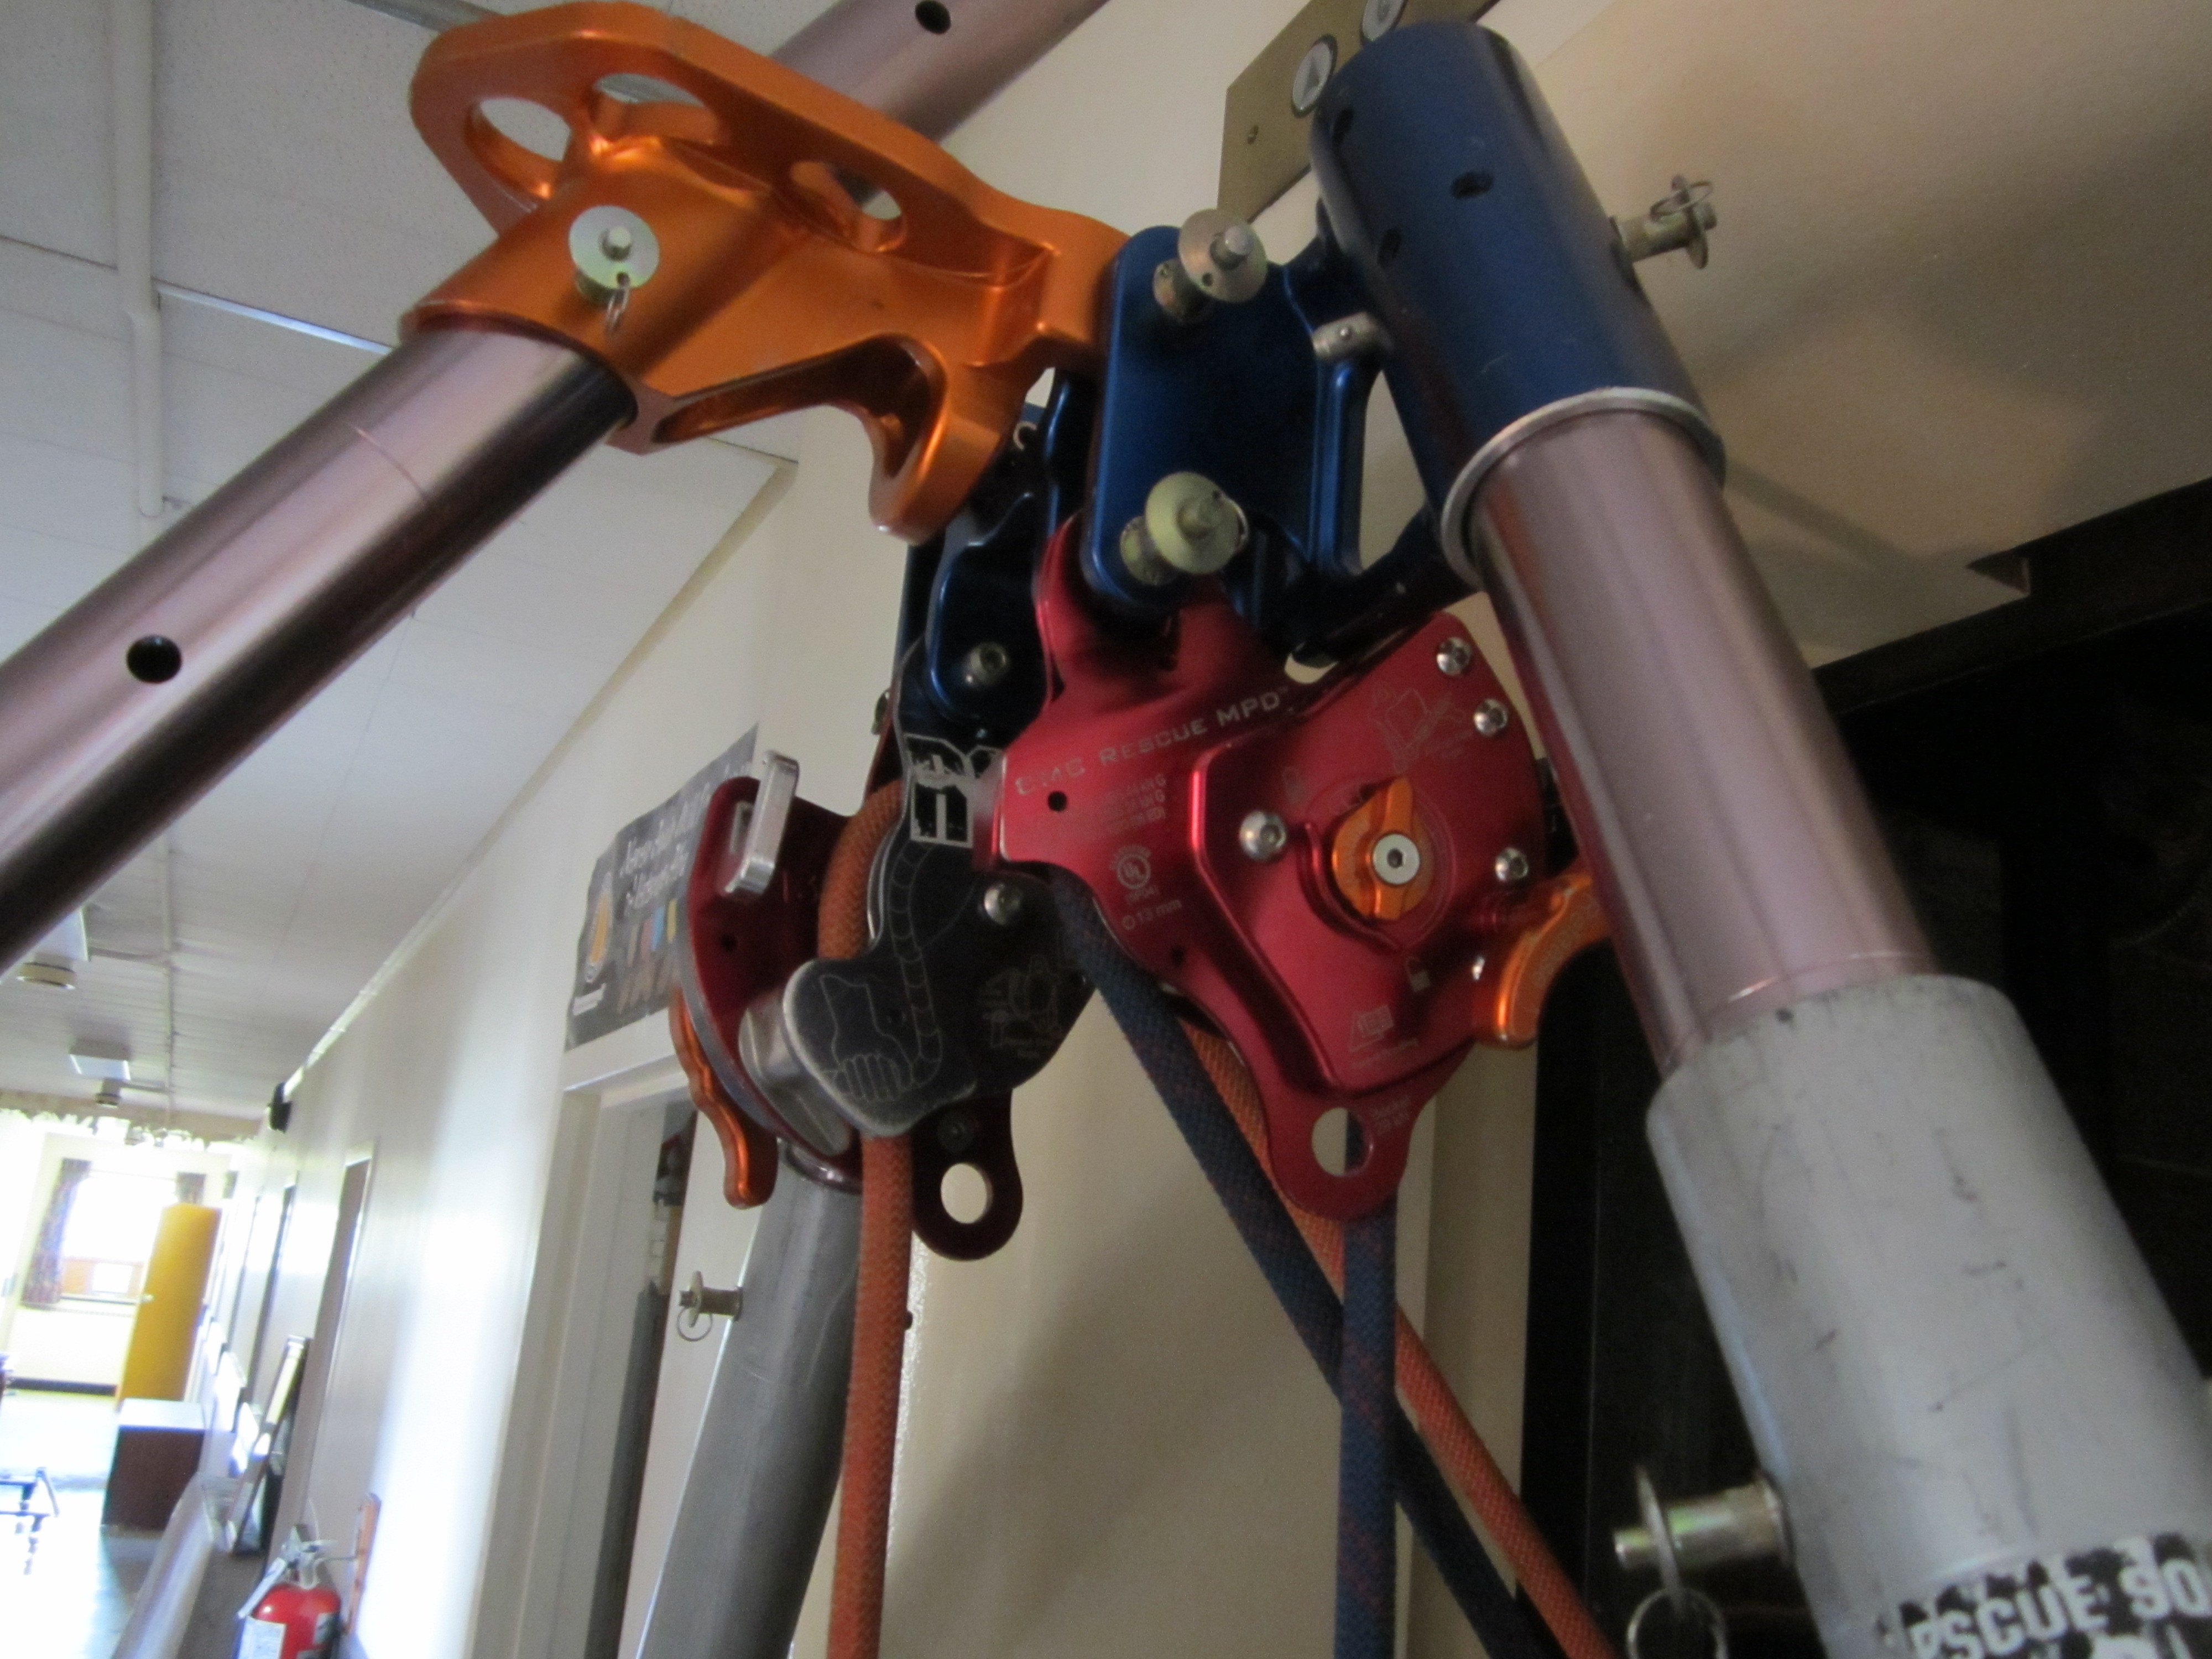
While there is great debate about whether the mirrored Two Tensioned Rope System (TTRS) using CMC Rescue Multi-Purpose Devices (MPDs) should or shouldn’t be the way to go, one argument seems to be more popular than others regarding it: If one of the lines should fail and the person operating the second MPD fails to let go, the load will have a catastrophic fall. This is a simplified statement that I feel sums up the majority of what the argument seem to be about.


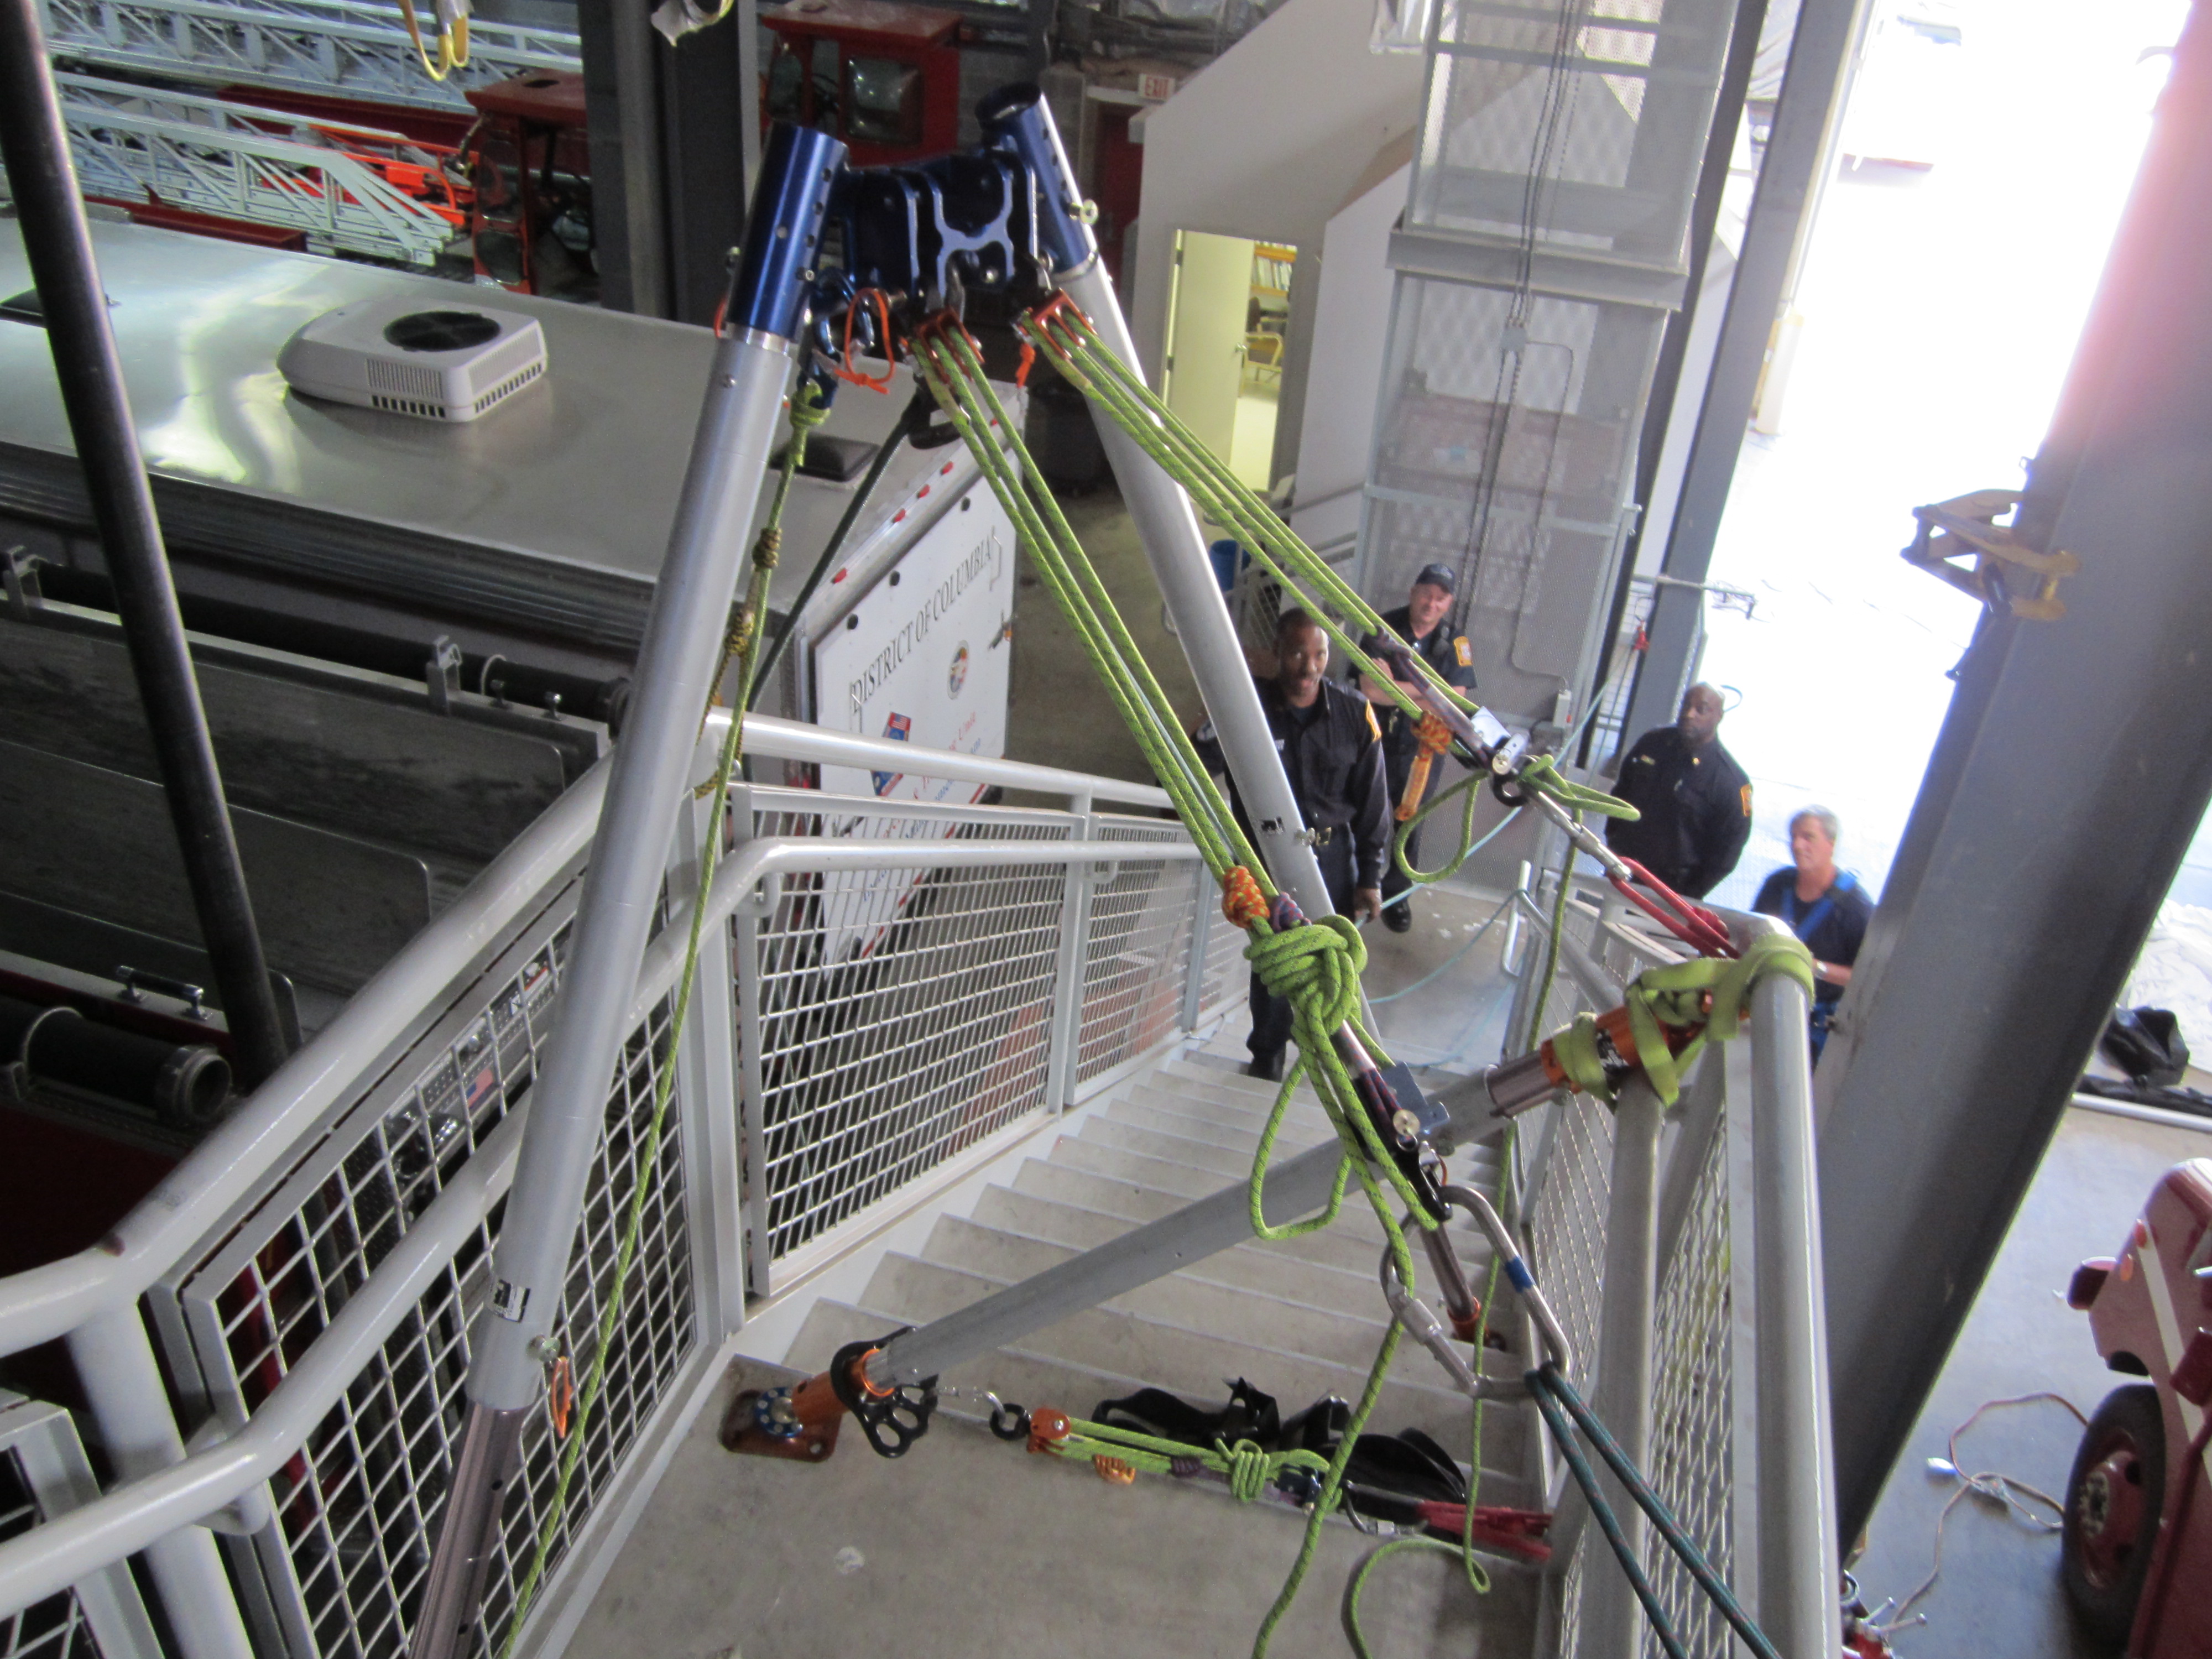
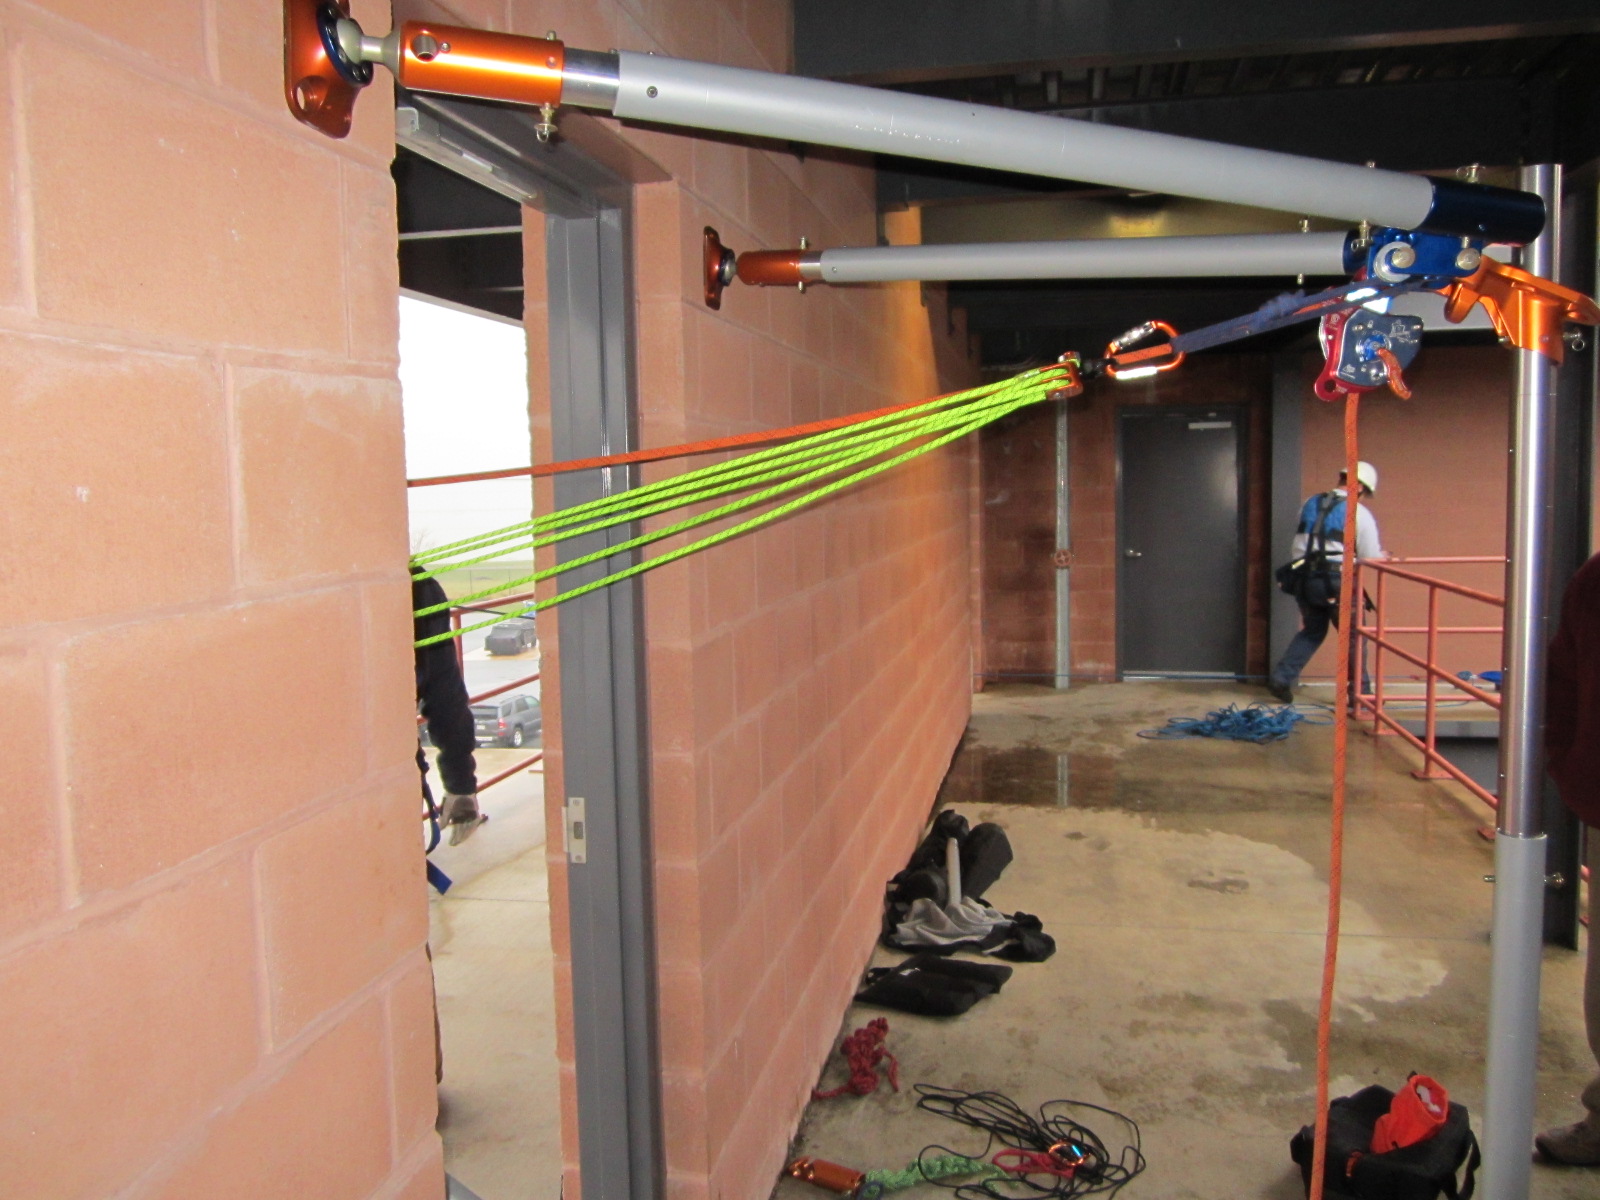
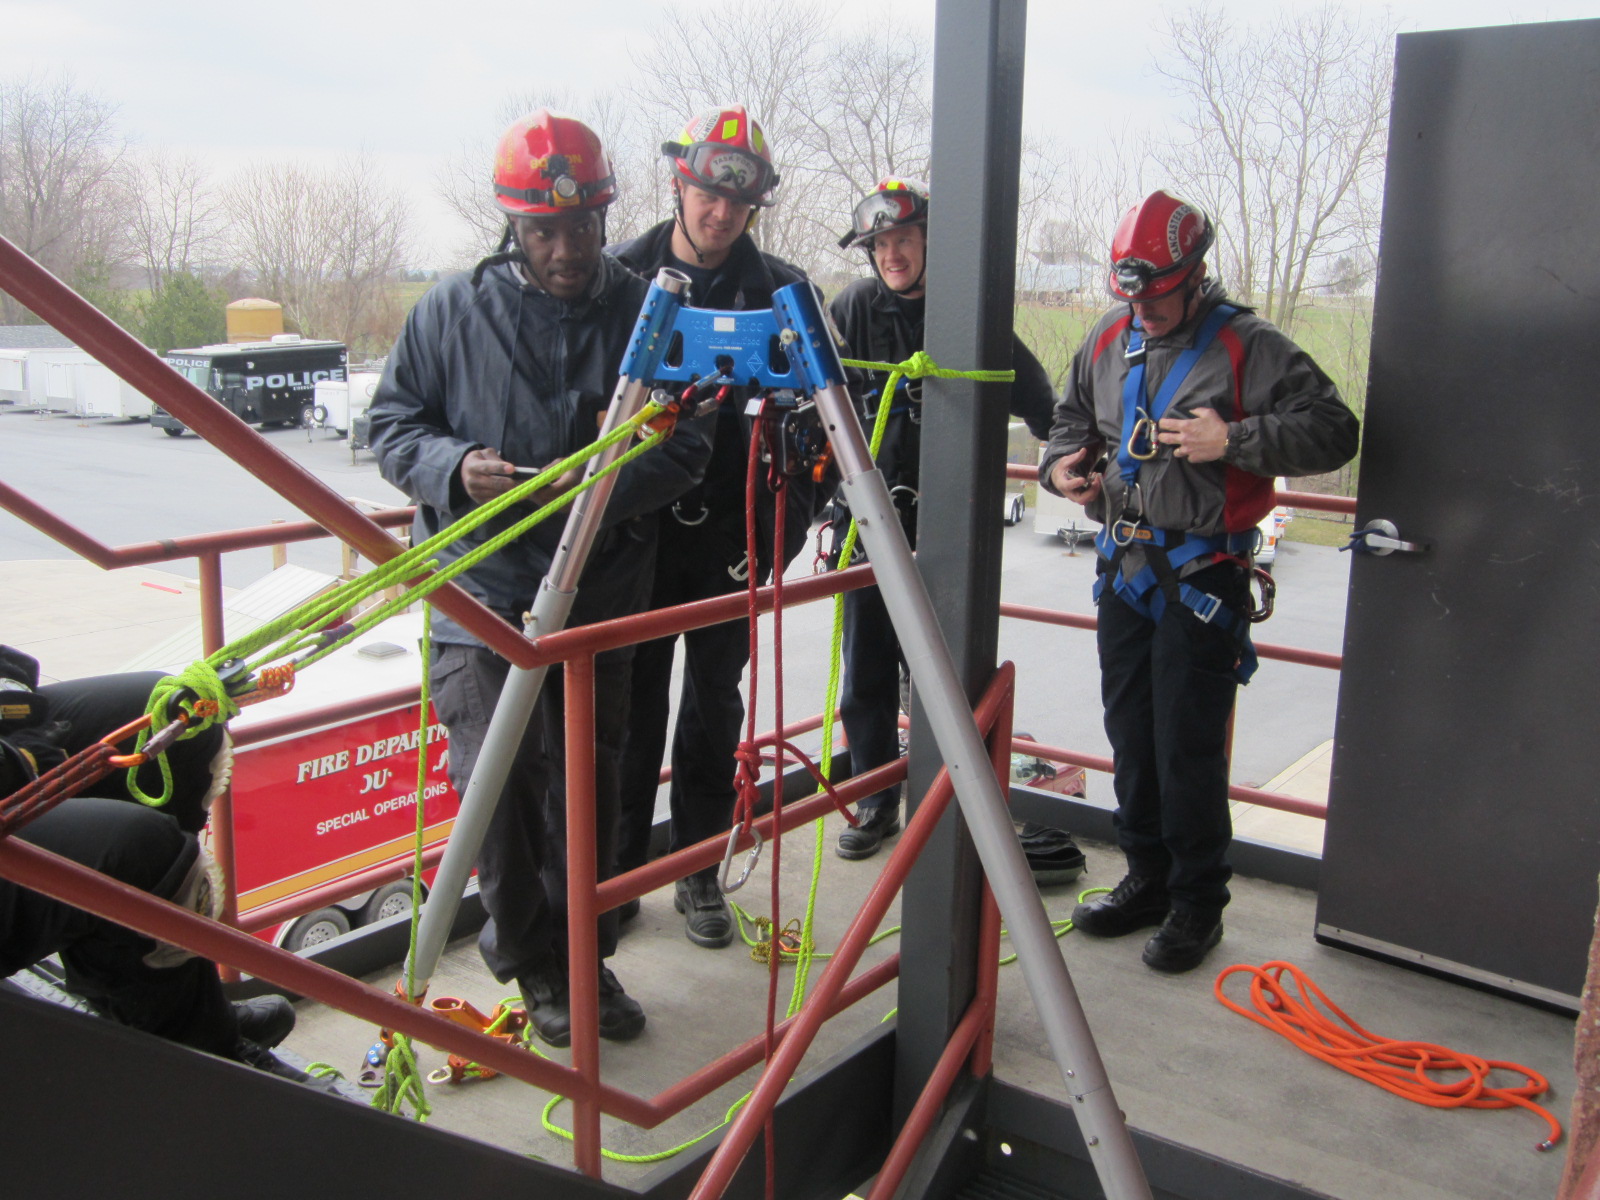
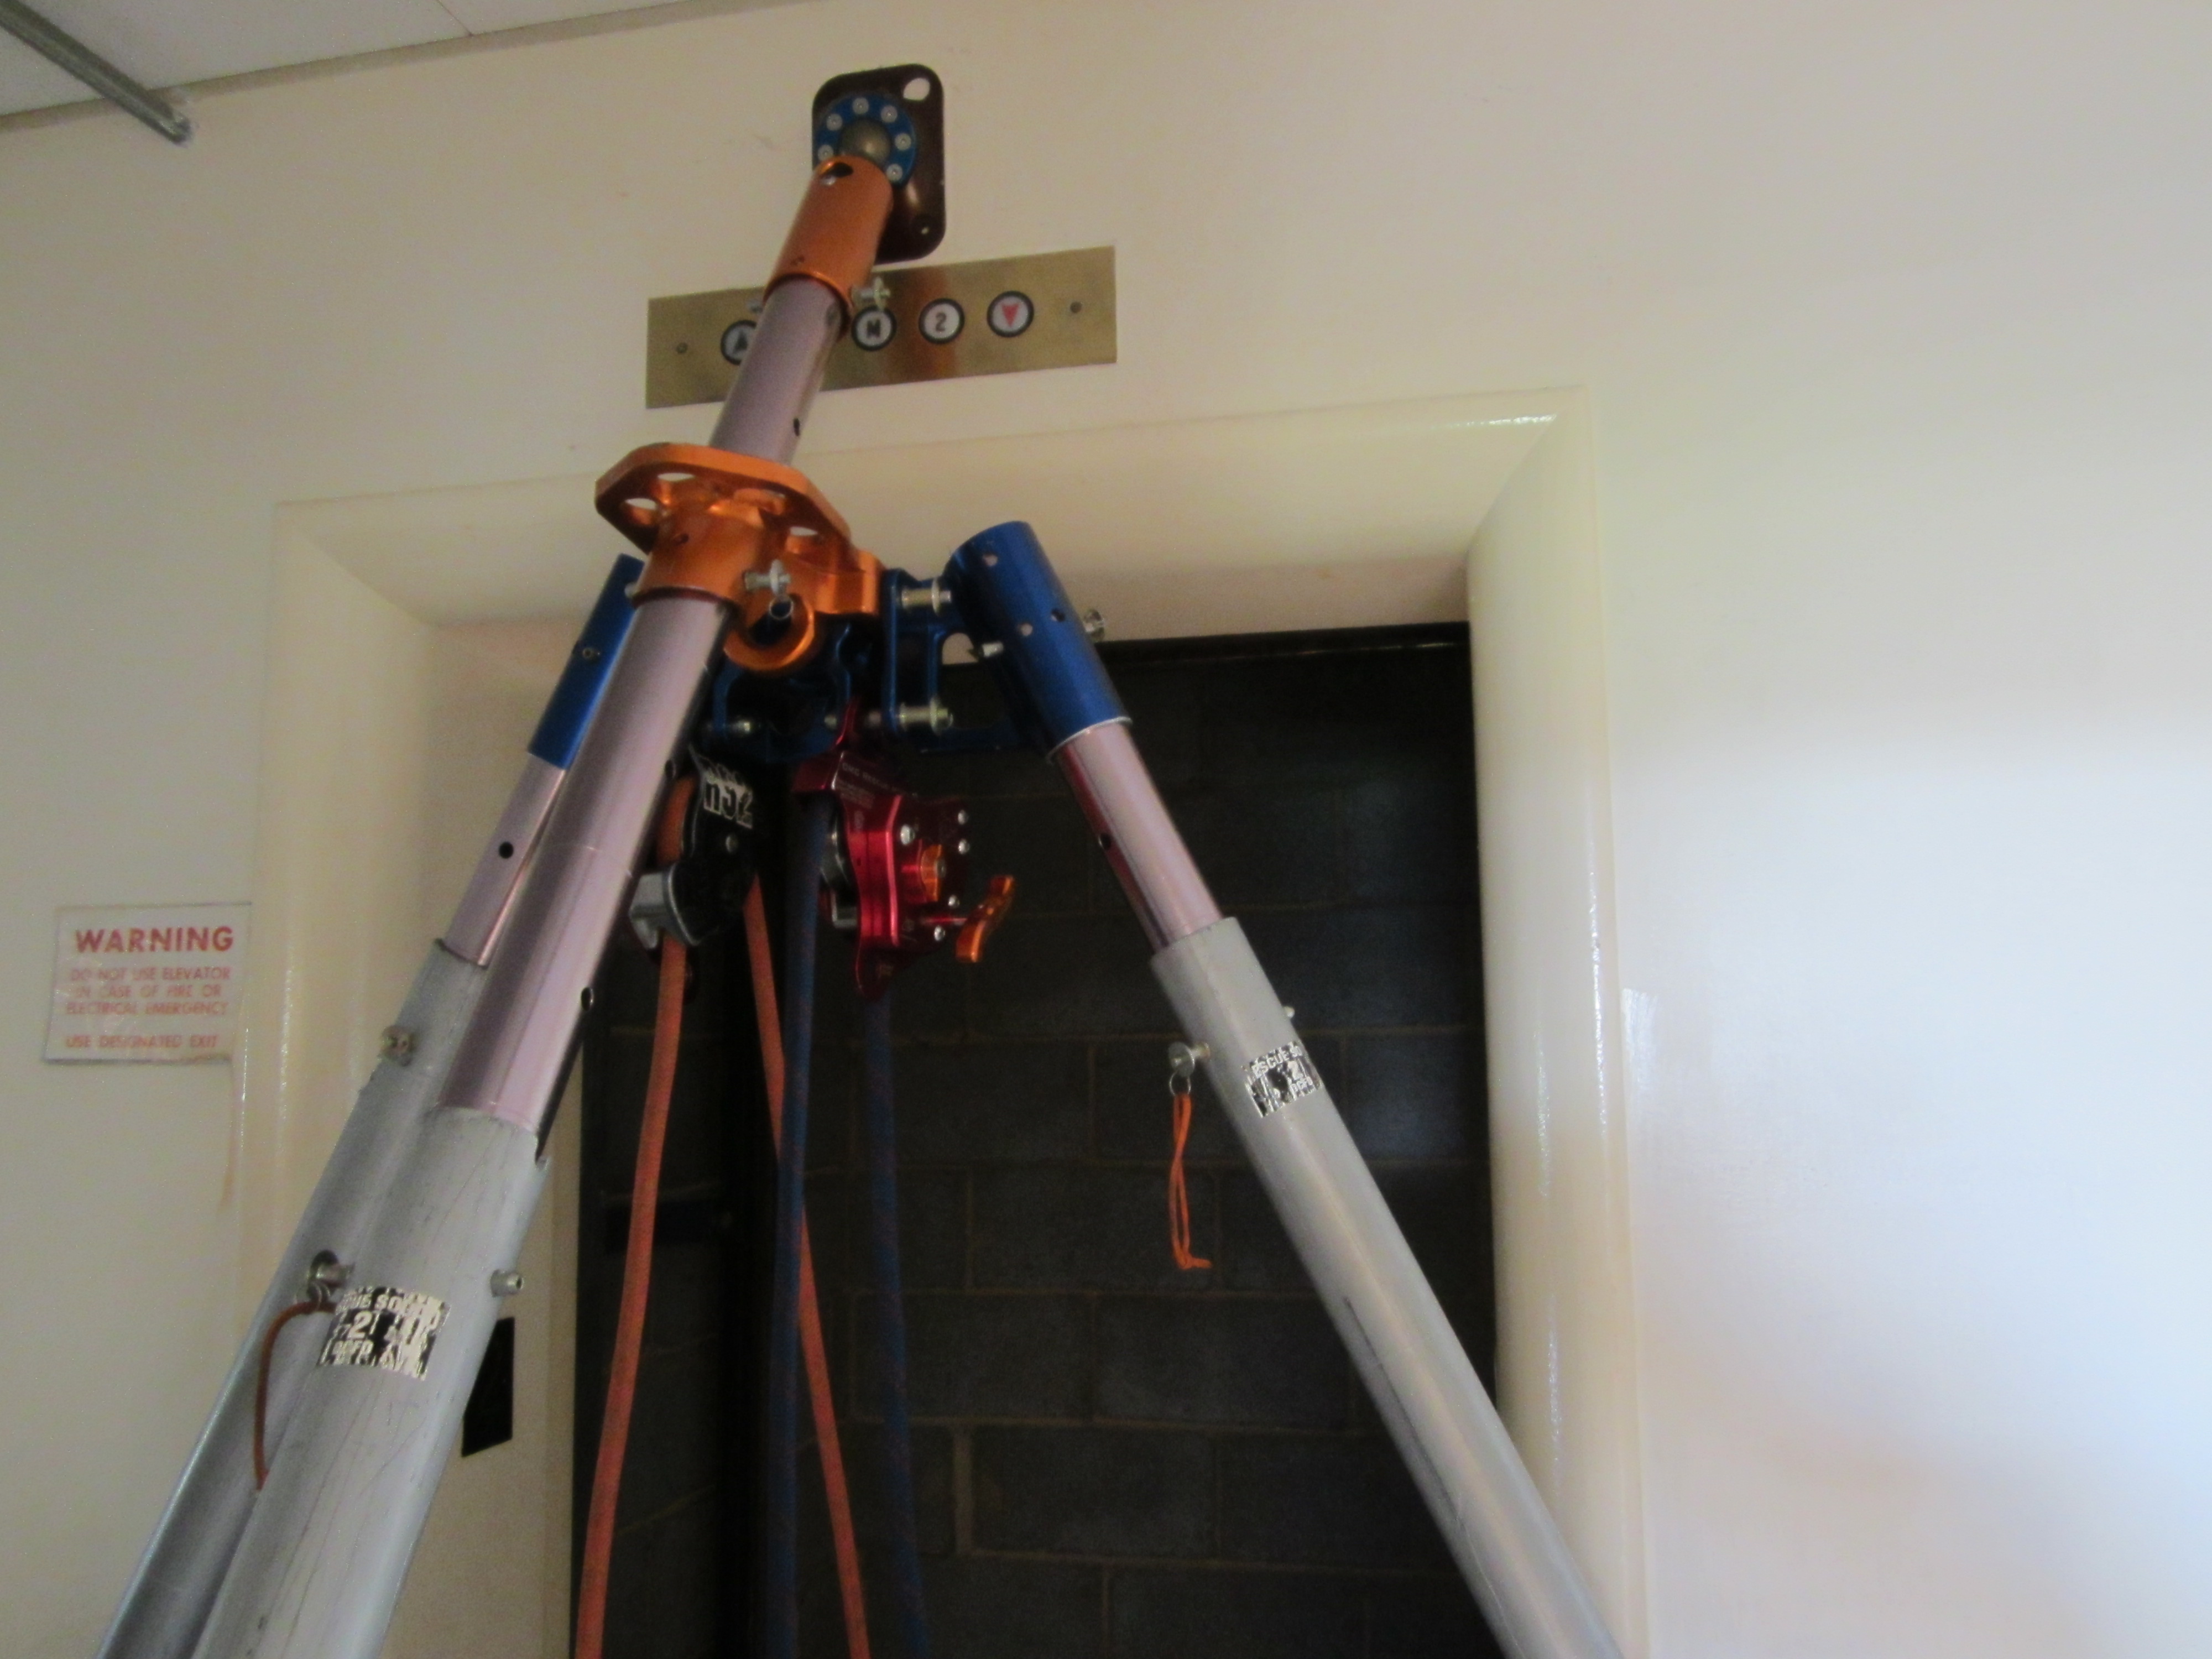
Mirrored system run off the head of an Appalachian Doortex:

IMG_1008

What I find most interesting with this argument is that we now want to account for a SECOND point of failure i our system. What if: one rope is cut, one anchor blows out, etc… AND what if the belayer doesn’t let go, doesn’t realize the first line is compromised, etc…

No other system rope rescue system is viewed in this perspective despite the fact that any belay system can be overridden by an inattentive belay operator. So if we want to assume a second point of failure, do we need a third rope? Of course not; we need a fourth in case the third one goes. I’m kidding, of course.

The arguments seem to hinge on whether or not failure one causes failure two and if the nebulous “human factors” can be accounted for. It’s an acceptable thought, but again, we don’t apply this anywhere else in our rigging process. Otherwise we would have tertiary anchors and ropes for every main anchor and change of direction. While human factors that can affect performance and safety are certainly worth looking at, I find it difficult to see how they can be applied equally to ALL systems.

What I think this segues into is a topic of the BCCTR BCDT (or more correctly ASTM F2436-05) criteria and whether or not it needs to be changed. The MPD meets the BCDT criteria. So does a T3WP and a 540. Both of these can be overridden when in use, but meet the BCDT criteria. How do we apply an equal rule about not letting go (human factor) of a device during a belay event? I don’t think there is one. By simply doing what ever you can to make a device fail while operating it during a belay test will only lead to a witch hunt against whatever device you don’t like.


The pessimist in me wants to do a presentation at ITRS entitled “They all Suck. A look at modern belay Devices” Now of course I don’t believe that, but I think this is the area that you will get to if you try and account for human factors in a test. As a fireman, I’ve seen lots of ways people have gotten themselves in trouble and I am positive that the rope world is not ready to account for human ignorance as part of a test method. I think the line has to be drawn somewhere. To quote the great author Douglas Adams: “A common mistake that people make when trying to design something completely foolproof is to underestimate the ingenuity of complete fools.” A better idea, and one already in NFPA 1006 (make of that what you will), is to have people pass a competency test to operate a belay system.

But do we really need another test? We’ve got the BCDT to determine if the device is capable. We’ve got the “whistle test” to test our rigging if everybody were to let go. These two tests can be equally applied to a traditional main and belay system as well as a TTRS. Is there a way to devise a test that can be equally applied to every system? If there isn’t, then maybe now is the time to figure it out. If not then I think the arguments, while not pointless, will probably not be solved. I can stand on one side of the argument and talk until I am blue in the face that the the TTRS with MPDs meets all of our current criteria and somebody else can stand on the other side and talk about what will happen when somebody doesn’t let go of the handle.

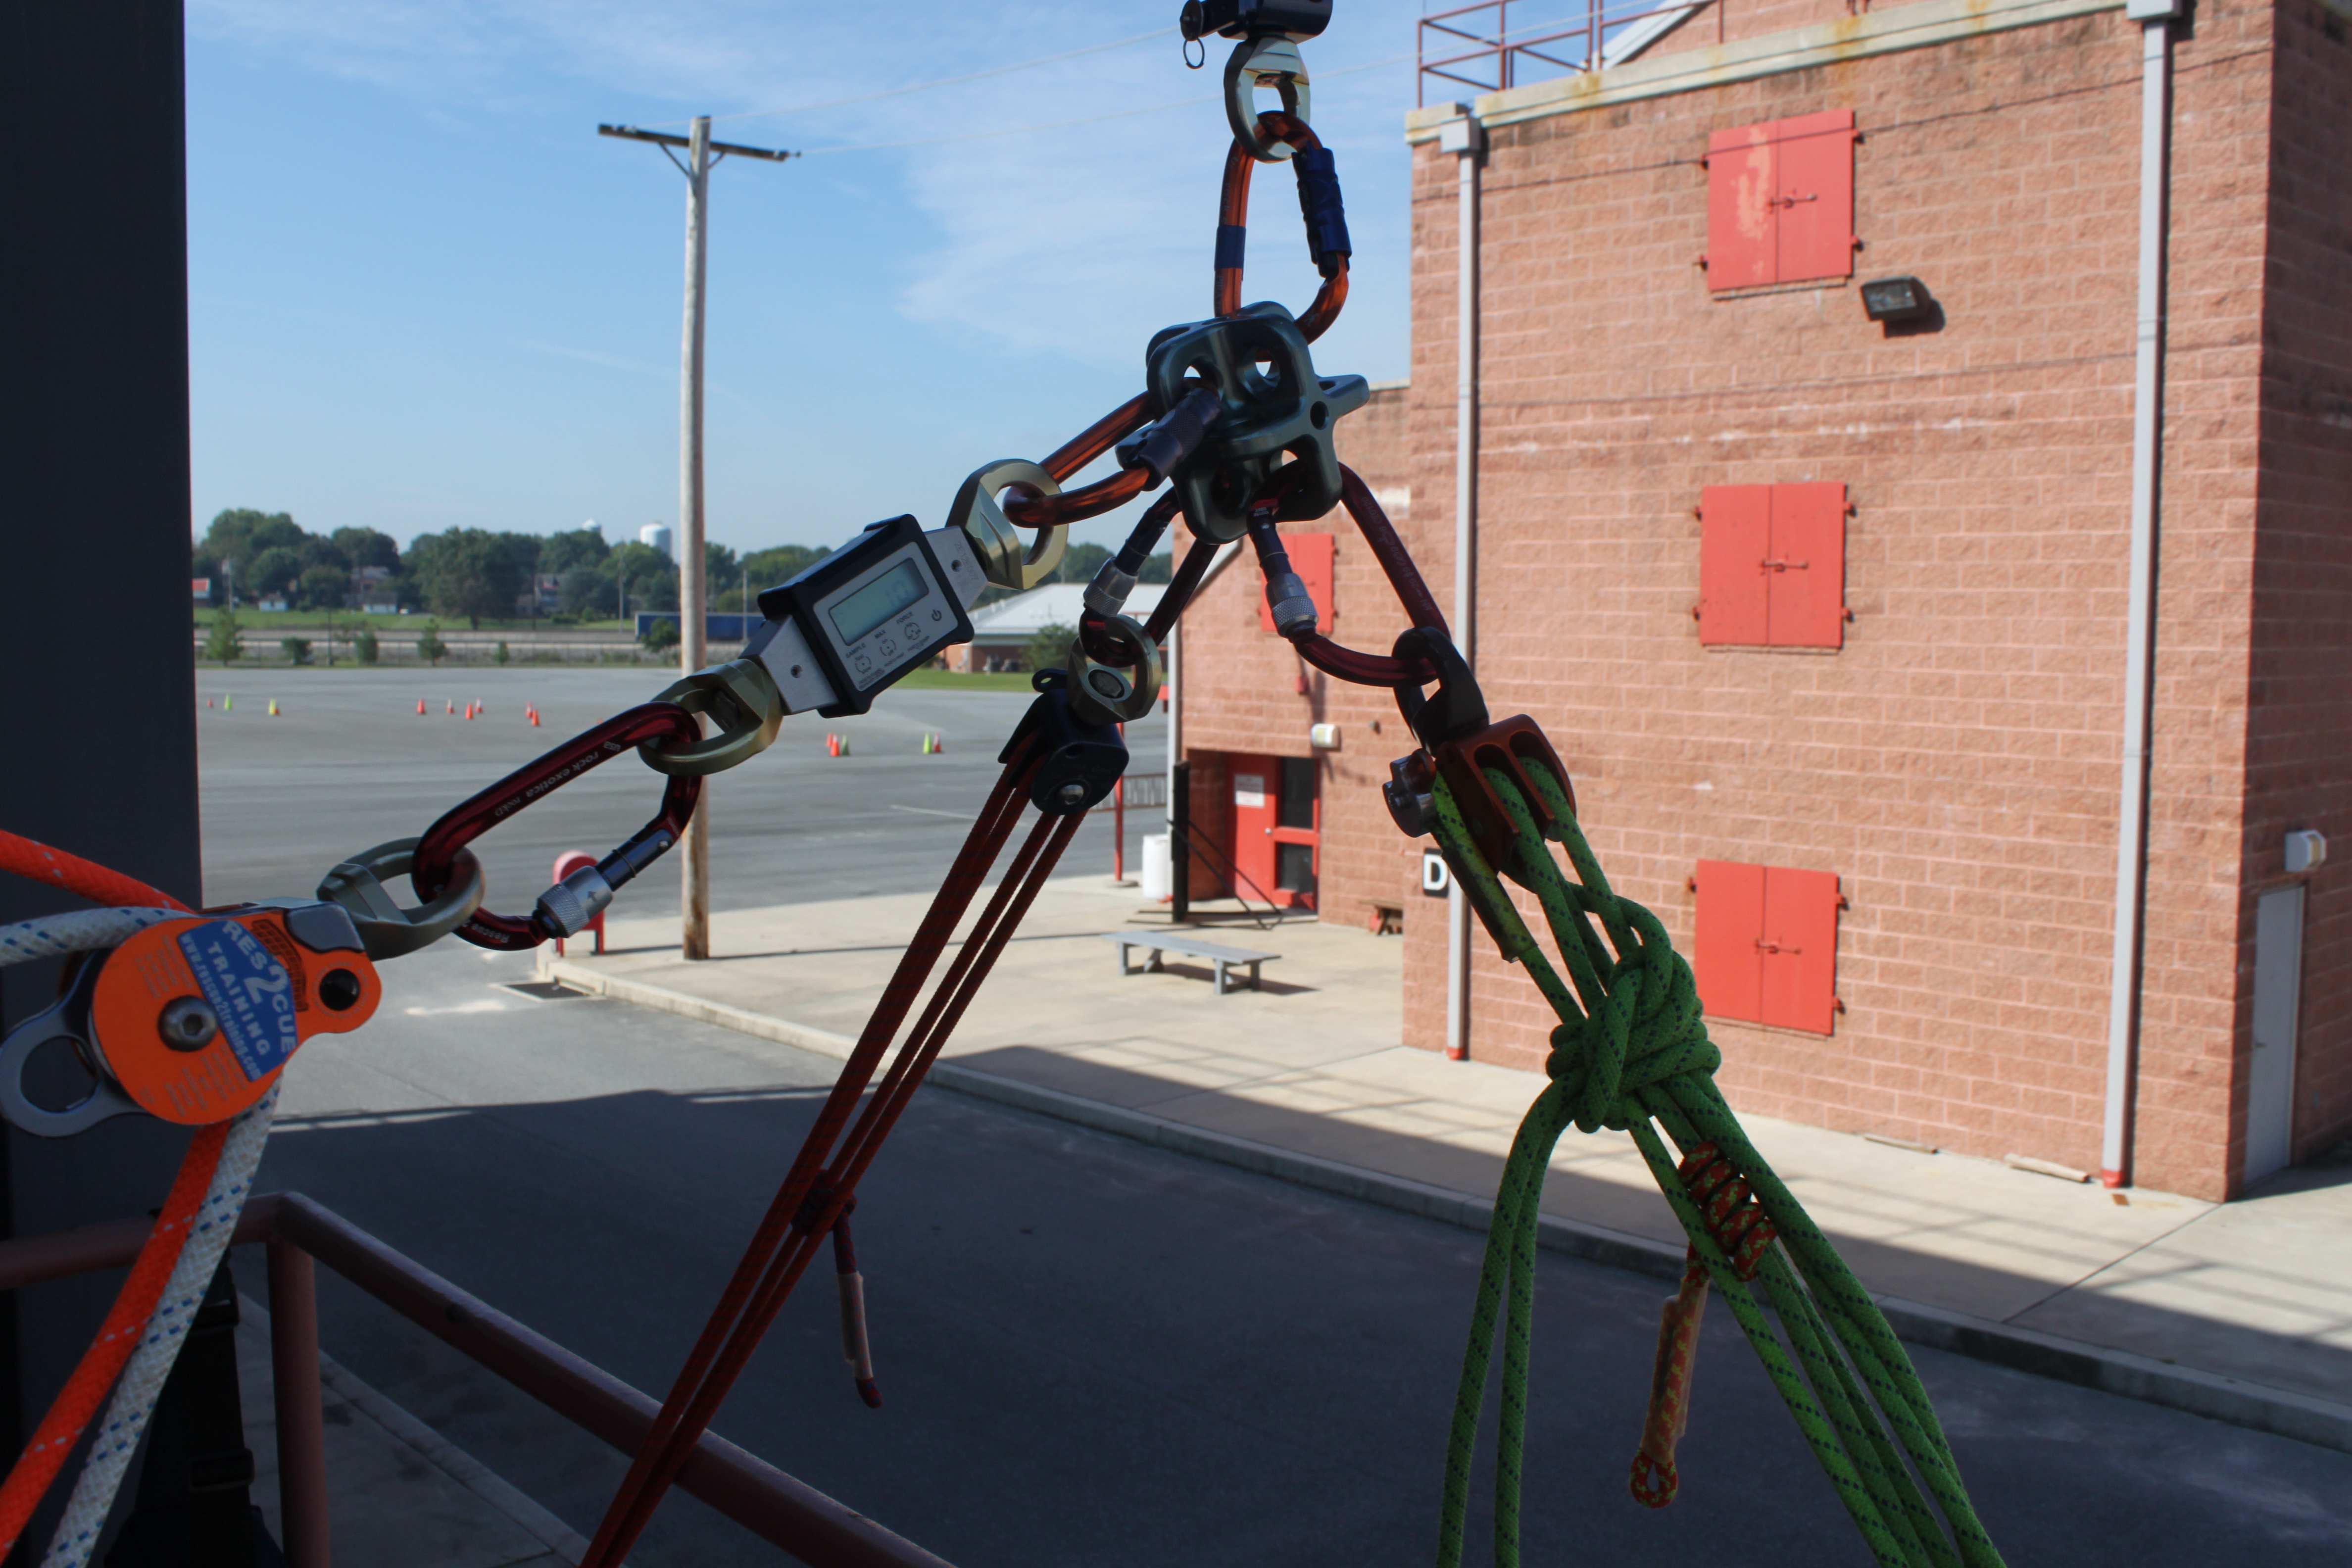
Here is a suggestion for one (expensive) way to solve this problem:


2016-02-06 08.37.22

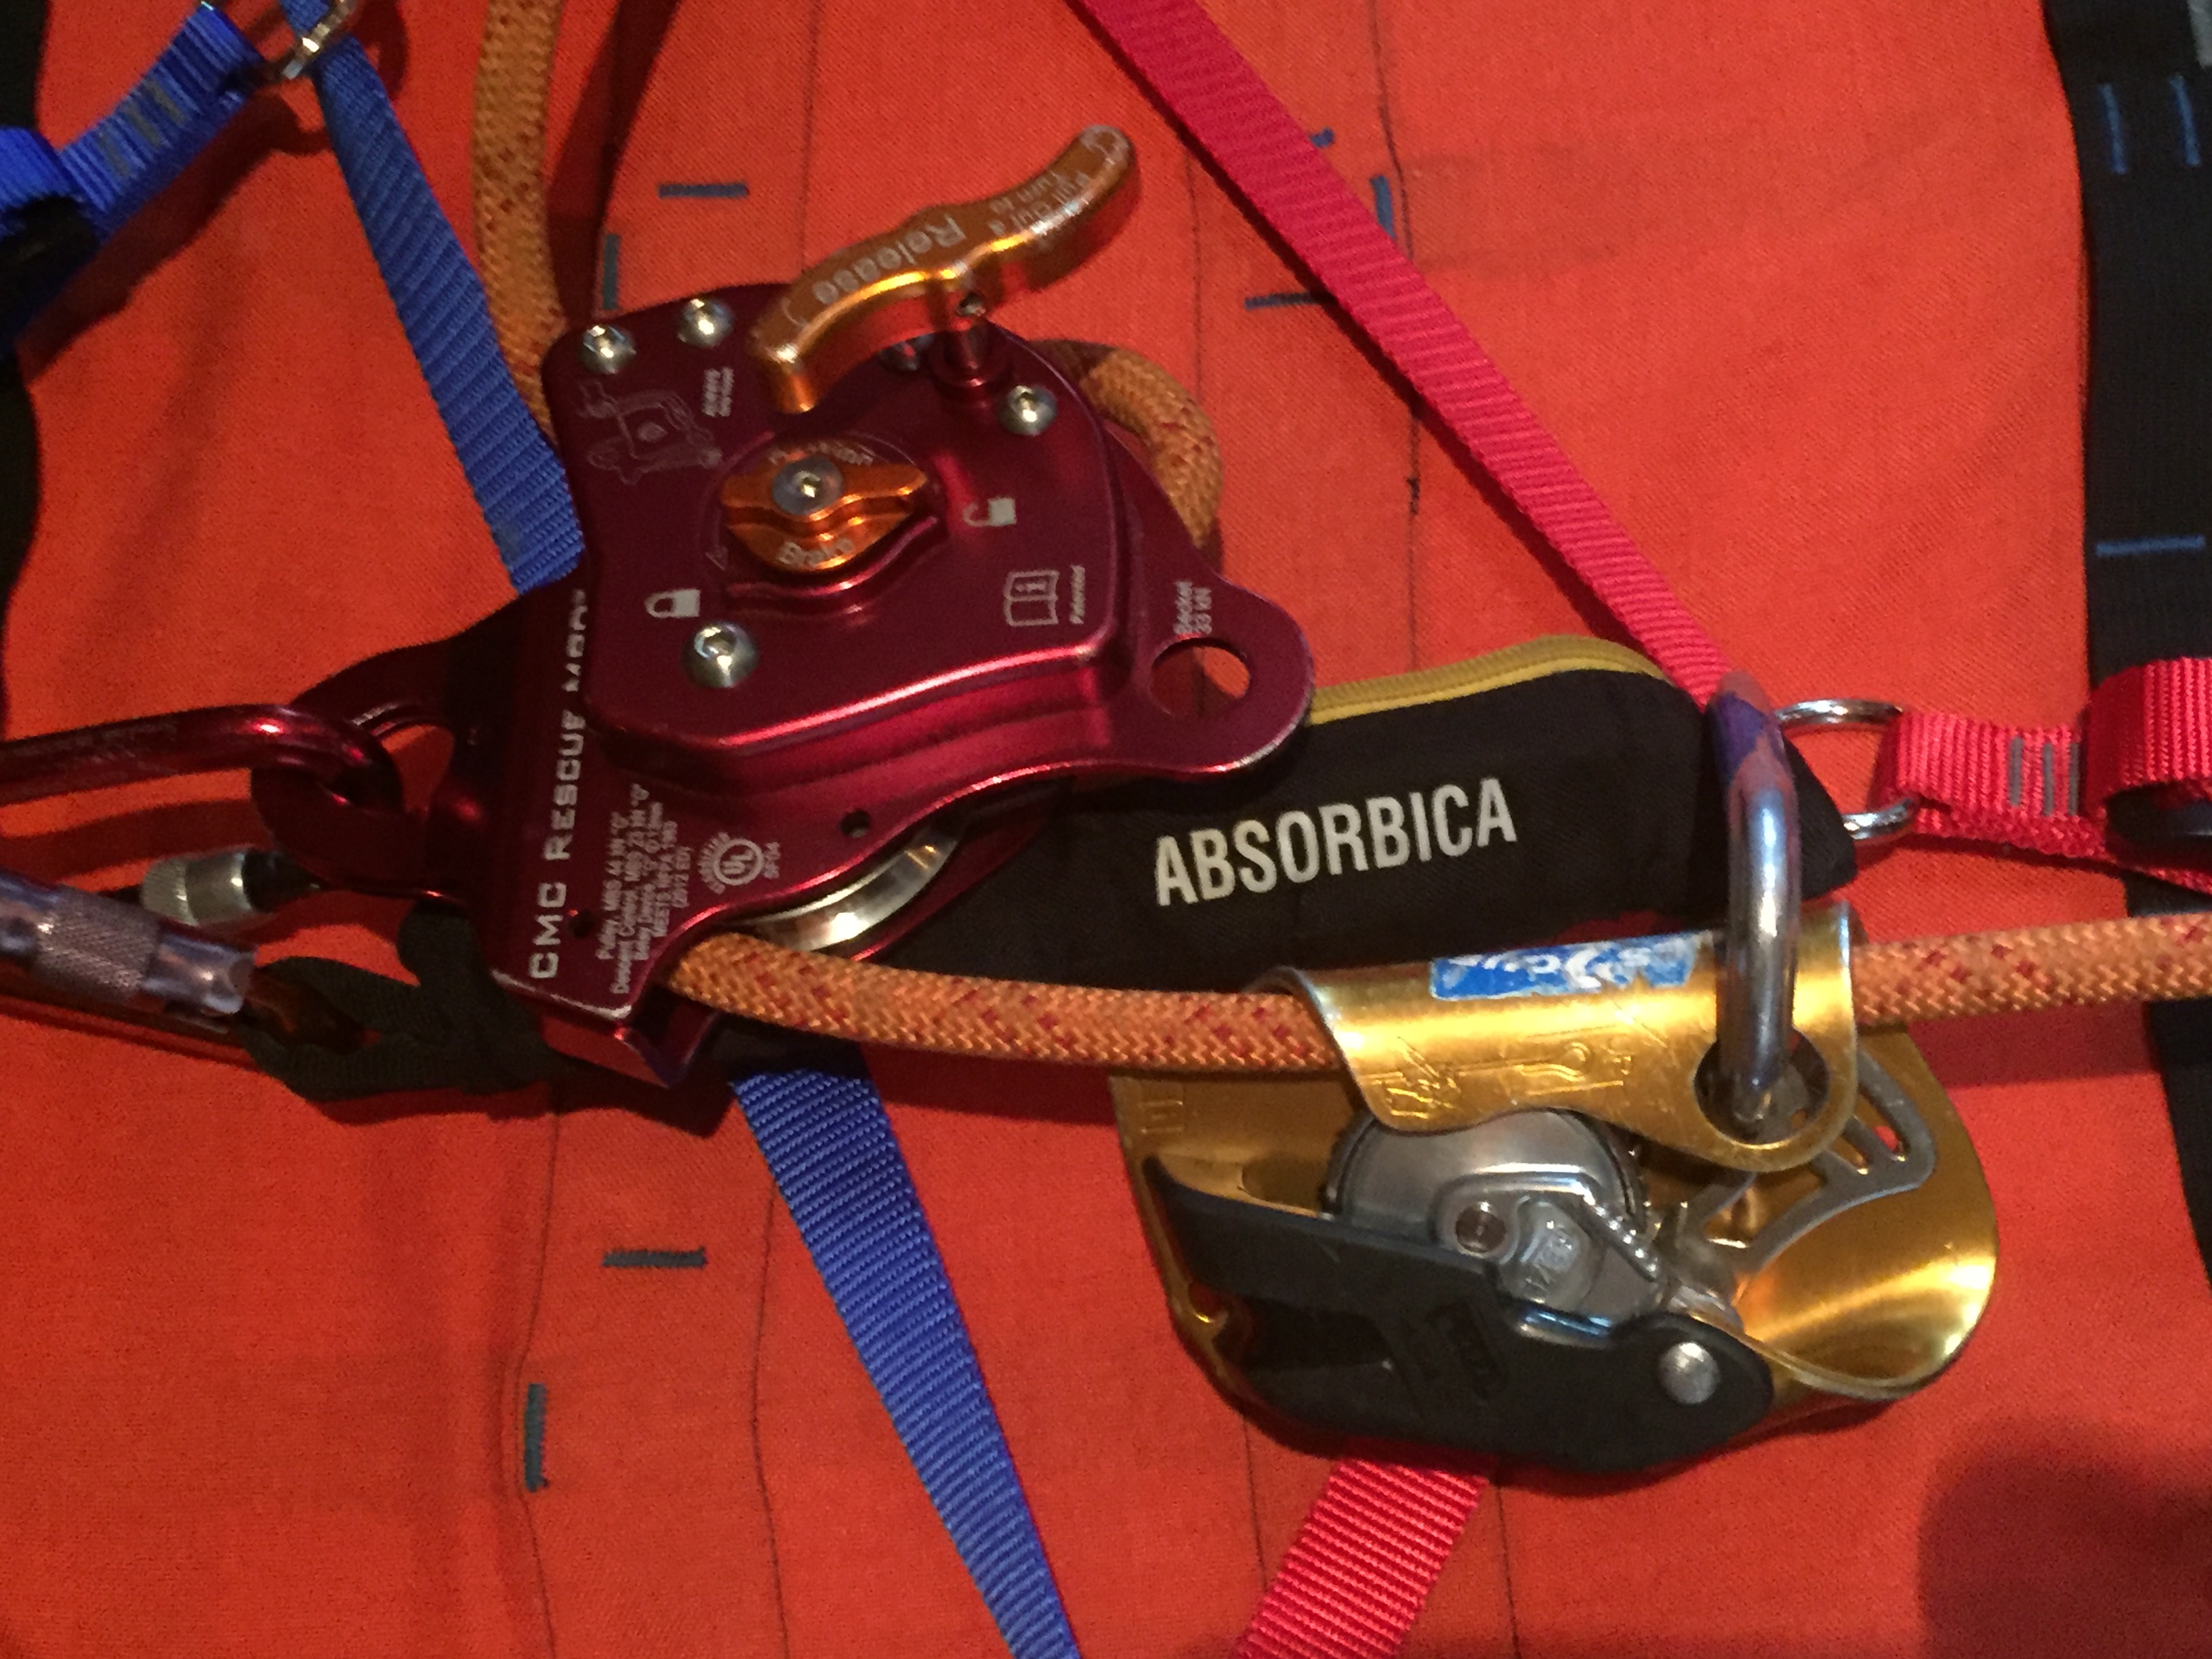
While the Petzl ASAP and L57 Absorbica are rated for two person loads for what Petzl calls “Accompanied Descent”, it is not shown in the instruction manual that you can attach it to the anchor to be used in the way shown in the picture above. I am extrapolating that it can be used that way. I have not tested this method yet, so I am only guessing as to its effectiveness. It is merely a possible solution to a problem that people have with an MPD based TTRS.

We get all off the benefits the TTRS has to offer as well as being protected from a runaway belay in the event of an inattentive operator.


Is an MPD based TTRS the be all, end all of rope rescue? Maybe, maybe not. But I do think it solves more problems than it causes. It also allows people who are required to perform rope rescue but don’t like it a safe way to operate, while at the same time allowing some unique options for the geek that a traditional slack belay system doesn’t allow.

There’s a ton of different ways to attach your travel restriction to your anchor; some right, some wrong. One of the easiest ways to make it happen is also one of the worst. Simply wrapping you  carabiner and rope around the anchor and clipping it back to itself is not an entirely uncommon sight.

Take a look at the videos below that were taken by Richard Delaney of Rope Lab and  Rope Test Lab on Facebook. They show what can happen if you actually took a fall on this type of tie off. This type of demonstration should be enough proof for the doubters that you should actually pay attention to how you tie off. It’s obviously an issue of training to make sure it always gets done correctly. Sometimes it can be the littlest attention to details that can have the biggest effect.


The wrong way:

IMG_1653

Better ways to tie off are to use either a clove hitch or Italian (Munter) hitch:IMG_1654IMG_1652


A department in Oregon was on the news for a rescue they accomplished when they rescued a kid who fell 50′ down a cliff while trying to retrieve a cell phone (thank goodness for job security). In the video footage win the link below, you can briefly see the setup they used during the actual rescue. The Fire Chief also took the opportunity of the news interview to have his guys using an Arizona Vortex at ground level for some good public education. Nicely done!

http://www.ktvz.com/news/crr-teen-seriously-injured-in-40-to-50foot-falll/35441476


If you are interested in upping your game on how to use the Arizona Vortex, we still have a few spots available for our Oct. 19 and 20 Modern Technologies in Rope Rescue class.  HERE

2015-09-24 10.08.31

Thank you to everybody for all of the interest! After filling up all of the spots in our first class in record time, we opened up a second class right after the first one. That class has now filled, too! Keep an eye out on the website for our upcoming classes. We will most likely have the next one in March. You can sign up for our mailing list in the column on the righthand side of the web page.


After many months and many requests, we are once again offering open enrollment for our popular Modern Technologies in Rope Rescue class. Come join us in Lancaster, PA on Oct 17 and 18 to learn how much more efficient your rescues can be with a few pieces of modern gear and a whole lot of practical applications learned from real world experiences. Here is your chance to keep up on the latest equipment and trends in the rope rescue world.


After filling up the Oct 17, 18 class in record 5 days (!!!) we have decided to run a second class the following 2 days. The registration is currently open for the Oct 19, 20 class. The link at the bottom of this page will register you for the second class.


Topics this time around include:

Use of the AZTEK kit to pass knots, perform a pickoff, basket attending, and a whole lot more.

In depth discussion and use of the Two Tension Rope System utilizing the MPD.

Use of  the Arizona Vortex  high directional in the urban environment.

The Rescue 2 Training original: The Appalachian Doortex! For urban anchoring and elevator rescue. High Directional? Anchor? Both!?… Come find out!

3 dimensional anchoring with the UFO.

The Skyhook capstan winch.

…And much more.

The cost of this two day, 16 hour class is $295 per person. Just bring a harness, helmet, and any ideas or equipment you would like to see used.

Please contact Kelly Byrne at 240-462-6610 or kelly@rescue2training.com with any questions.


IMG_0903IMG_0631IMG_1011IMG_0437IMG_1243azorp gin pole


It seems that despite the lack of American popularity, the technique of the “Kickoff Pickoff” is pretty widely used throughout the rest of the world. Take the video below, sent to us by Will Paces from NIPSTA, as an example. It’s the latest in a line of this “unique” style of rescue that we have presented here. Looks like a fun drill to practice at work! I don’t think I’d want to be the victim though.


Judging by the results of the technique, it would appear that speed and power are a vital part of making the “Kickoff Pickoff” technique work properly. Witness what happens when you pussyfoot around with the technique (I’m not sure why I can’t get the video to embed, but it is definitely worth watching):


 https://www.youtube.com/watch?v=2_Wsy_EF_JY


Not quite as high speed, but certainly just as interesting is this awesome pickoff grab of a guy who was caught midair and wrestled back over the railing. Quick acting by all parties involved!


We’ve had a huge demand to run this class again this spring, so we’ve finally added this open enrollment class to our calendar. Here is your chance to keep up on the latest equipment and trends in the rope rescue world.

Join us in Pennsylvania Dutch country for our latest presentation of Modern Technologies in Rope Rescue at the  Lancaster County Public Service Training Center on April 25 and 26 2015. Using the newest techniques on the newest equipment in an urban setting, come learn ideas that have been proven and tested in the real world in both urban and wilderness settings.

Topics included this time around include:

Use of the AZTEK kit to pass knots, perform a pickoff, basket attending, and a whole lot more.

In depth discussion and use of the Two Tension Rope System utilizing the MPD.

Use of  the Arizona Vortex  high directional in the urban environment.

The Rescue 2 Training original: The Appalachian Doortex! For urban anchoring and elevator rescue. High Directional? Anchor? Both!?… Come find out!

3 dimensional anchoring with the UFO.

The Skyhook capstan winch.

…And much more.

The cost of this two day, 16 hour class is $295 per person. Just bring a harness, helmet, and any ideas or equipment you would like to see used.

Please contact Kelly Byrne at 240-462-6610 or kelly@rescue2training.com for registration information or questions.


azorp gin poleIMG_0221IMG_0211


IMG_7687IMG_1428IMG_1415IMG_1419

Take a look at the video below. While performing a rescue, one rescuer was swept away by the moving water. You can see that the rescuer is not panicking and is following his training. He has his feet up, facing downstream and is on his back. After a couple of unsuccessful throw bag attempt he rolls over, faces up stream, gets a ferry angle and starts swimming towards the shore. When he sees a rescuer running along side of him with a throw bag, he gets ready, grabs the rope and is swung into the shore while the thrower assumes the correct position to act as an anchor. Good job all around.

One other small, but cool point is that when the final thrower tosses the rope behind the rescuer and out of reach, he simply runs a little faster to drag the rope right to the rescuer. Cool technique that probably isn’t taught many places, but I would guess comes from a lot of drilling.

There are a lot of reasons to be proficient in technical rescue. Here is a picture of the rescuer with his family that his wife put up on Facebook. Seems like three good reasons to me:

swiftwater family


Take a look at the first video in the link below. It’s a news story out of Fort Wayne, IN that I assume was supposed to be a simple feel good piece highlighting the local rope rescue team. If you want to jump right to the good stuff, go to the 2:10 mark in the video. What you will see is a really big, really expensive mousetrap.


I do feel a little bit bad about Monday morning quarterbacking this video… but not enough to cause me not to do it.


First, the critical point at the Kootenay Carriage. It would appear that there are two track lines, and two upper control lines (although no lower control lines) with tails going down to the rescuer and victim. The Kootenay, however, remains a critical point. Do I think it will fail?  No. But we rig for failure caused by human factors, not equipment factors. Should that Kootenay fail though, the basket could take a major and possibly fatal swing fall.


Second, there is difficulty with attempting to get the basket back up over the edge after they took a ride down and back up the track lines. The reason given in the report is that the “ropes stretched”. While I don’t doubt they stretched, take a look at the link the news story below the youtube video. The second video is extra footage they got while doing the shoot. It is obvious from watching it that they were going to have this problem. While initially loading the basket over the edge you can see how far it drops down when it is initially loaded. It’s about the same distance that they are below the edge when they come back up.


Rope stretch? Maybe.  Foreseeable problem? More likely.  I’m curious if the attendant could have stood on the end of the basket in order to raise the head up and over the edge. Also a factor is the excessively tall bridle they use. Judging by the video, I’m guessing from the bottom of the basket to the top of the carriage to be six feet in height.


Third, you can see from this picture just how close the resultant is to being outside of the footprint of the tripod. When the track lines were tensioned to raise the load, I’m curious if the friction in the pulleys caused them to temporarily move the resultant until they found their center again.

Inside look at high angle rescue training_00000


Fourth, two statements made during this gave me a bit of heartburn. The first is that the “white rope didn’t work the way it was supposed to.” Ropes work exactly as they are rigged. Unless it broke under tension due to unseeable chemical degradation, it was rigging failure.  It’s hard to tell what the white lines were rigged to, but I’m guessing they got pulled up off of whatever they were on. The second statement is that “nobody was dropped…they were lowered”.  If it was unexpected and uncontrolled, it was a drop. Maybe I would have been inclined to say the same thing out of embarrassment while on camera, but lets call it what it is.

Last, neither the reporter in the basket, nor the one on the roof seen just before the tripod topples, have a helmet on. If I were running this show, it probably would have been an afterthought for me too. Having seen this video, I’d be willing to bet it would be a fatal blow if a tripod toppling like that hits you in the head, helmet or not.

I do applaud Ft. Wayne TRT for allowing this to air (if in fact they had a choice). It’s sometimes hard to admit a goof up. It’s even harder to have it on tape for guys to critique from a distance without knowing the full circumstances (me). The least we can do is try to learn from it.


More footage in the second video here:

http://wane.com/2014/09/05/safety-at-center-of-high-angle-rescue-training/ 

Here are two great videos from DRR Rescue posted on youtube that show how to construct a 1-1-1 picket system, which is three pickets placed in a row.

Two things stood out to me in these videos. First, I really like the system they used to tie the pickets together. I’ve seen a few different variations on the technique, most involving some sort of windlass to tighten the webbing. Doing that requires more hardware, as well as driving in another piece of rebar. The videos show what amounts to a non working 3:1 with webbing.

The second thing that really stood out was how much force this system was able to hold. They put over 6ooo lbs of force on the system. While the picket did flex a little bit, it did not noticeably pull forward in the ground. I’m anxious to try this in the rain soaked, clay dirt around my house!

Thanks again to DRR for sharing these with the world. Be sure to check out the tutorial section on the website as well as their field guide, that thing is full of great, easy to apply info.  http://www.desertrescue.com

There is a lot to be said for how far technology has allowed us to go in the world of ropes as it relates to safety: Stronger yet smaller ropes, lightweight high strength aluminum hardware, etc… But is fun to cast our thoughts back to where the rope rescue world has ascended (that’s a pun) from. Check out the rescue drama in the youtube video below. It is from 1949 and was posted by Ron Holan on the Rope Access Technicians Network group on Facebook.

The neat part about this for me was that they didn’t use any carbiners or friction devices to lower the casualty. It was all done with friction wraps around their bodies and around rock outcrops. While this might not be how a rescue should be done now, given all of our available equipment, it is none the less a look at how a rescue can be done without any equipment.

Maybe you could use this video as an idea for a drill: Only use a Stokes basket and a rope, no hardware, to accomplish lowering a package down a building, catwalk, mountain, etc… Oh, and they weren’t using Prusiks either. They only had trust in each other!


Also pretty darn old school is this picture of Silver Spring VFD using the ladder truck for a high directional to get a Stokes basket off of the roof of a one story school and down to the ground. Thanks to our Florida friend Joe Schulman for findiong and sharing this one.


It’s hard to tell for sure from the picture, but it looks like the rope is just hard tied to the tip and the ladder is just craning the load.  Similar to one of our previous posts HERE , it’s also another example of how it might be easy to access a patient via ladder and use a rope system to get them down.

old school rope rescue