firefighting

Here are two great videos from DRR Rescue posted on youtube that show how to construct a 1-1-1 picket system, which is three pickets placed in a row.

Two things stood out to me in these videos. First, I really like the system they used to tie the pickets together. I’ve seen a few different variations on the technique, most involving some sort of windlass to tighten the webbing. Doing that requires more hardware, as well as driving in another piece of rebar. The videos show what amounts to a non working 3:1 with webbing.

The second thing that really stood out was how much force this system was able to hold. They put over 6ooo lbs of force on the system. While the picket did flex a little bit, it did not noticeably pull forward in the ground. I’m anxious to try this in the rain soaked, clay dirt around my house!

Thanks again to DRR for sharing these with the world. Be sure to check out the tutorial section on the website as well as their field guide, that thing is full of great, easy to apply info.  http://www.desertrescue.com

There is a lot to be said for how far technology has allowed us to go in the world of ropes as it relates to safety: Stronger yet smaller ropes, lightweight high strength aluminum hardware, etc… But is fun to cast our thoughts back to where the rope rescue world has ascended (that’s a pun) from. Check out the rescue drama in the youtube video below. It is from 1949 and was posted by Ron Holan on the Rope Access Technicians Network group on Facebook.

The neat part about this for me was that they didn’t use any carbiners or friction devices to lower the casualty. It was all done with friction wraps around their bodies and around rock outcrops. While this might not be how a rescue should be done now, given all of our available equipment, it is none the less a look at how a rescue can be done without any equipment.

Maybe you could use this video as an idea for a drill: Only use a Stokes basket and a rope, no hardware, to accomplish lowering a package down a building, catwalk, mountain, etc… Oh, and they weren’t using Prusiks either. They only had trust in each other!


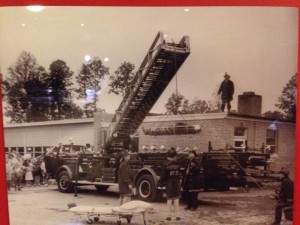
Also pretty darn old school is this picture of Silver Spring VFD using the ladder truck for a high directional to get a Stokes basket off of the roof of a one story school and down to the ground. Thanks to our Florida friend Joe Schulman for findiong and sharing this one.


It’s hard to tell for sure from the picture, but it looks like the rope is just hard tied to the tip and the ladder is just craning the load.  Similar to one of our previous posts HERE , it’s also another example of how it might be easy to access a patient via ladder and use a rope system to get them down.

old school rope rescue

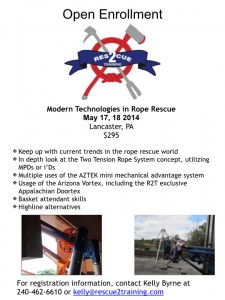
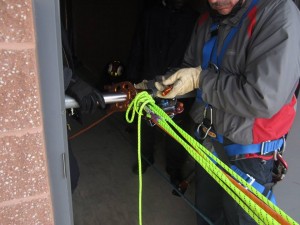
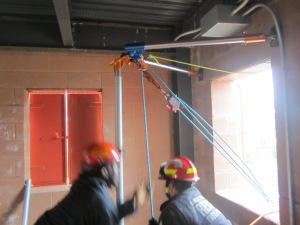
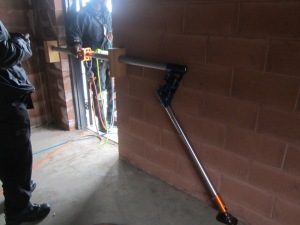
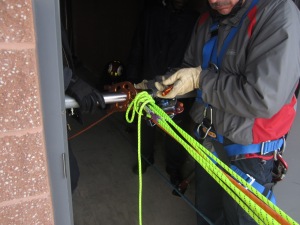
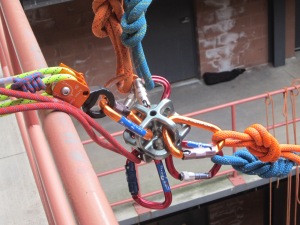
We have just added an Open Enrollment Class for our Modern Technologies in Rope Rescue workshop on May 17 and 18 in Lancaster, PA.This class covers a lot of ground in two days. We will discuss and use the AZTEK in many of its essential uses. We’ll also be using the Two Tension Rope System concept with the CMC MPD. Additionally, we’ll be using the Arizona Vortex in some of its traditional configurations as well as the Rescue 2 Training original: the “Appalachian Doortex” configuration for urban anchoring and elevator rescue.

Come out and try the newest equipment and techniques in rope rescue. Cost of the class is $295.

Email Kelly M Byrne at kelly@rescue2training.com or call 240-462-6610 for more information.

open enrollment lancaster may 2014.001ufo 2ufo 1
mpd 1

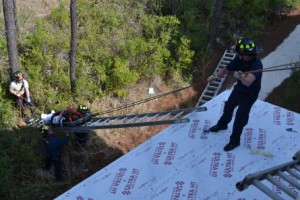
The recent rescue by the South Walton Fire District’s Technical Rescue team in Florida is a great example of rescue where it is easy to access the victim by something as simple as a ladder, but where a rope based system might still be the best alternative for getting them down to the ground safely.

You can see in the pictures that the guys on the ground are able to guide the basket most of the way to the ground while it is supported on  the ladder and being lowered with rope.

Two quick points: If possible, I would have tried to line up my ladder with my anchors so that it was all in plumb. Maybe there is a good reason they didn’t. It’s hard to tell from just a picture.  Secondly, you can see how easily they overcame this by just having a rescuer on the roof do a very minor deflection by just pulling on the rope. It’s a good example of knowing how to easily overcome a problem by knowing a few physics tricks.

http://www.waltonsun.com/news/construction-worker-saved-by-swfd-1.297343#

Not all rope calls are high pucker factor incidents of life and death. Sometimes it’s just the simplest way of getting  the patient to the ground. Good job, guys.


swfd easy access

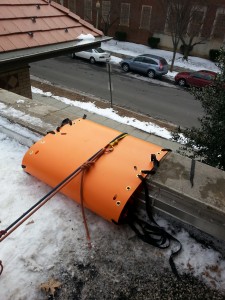
We were messing around the other day with some variations on how to better perform the best way to get a vertically oriented basket up over a 90 degree edge, which is know alternately as the “Pike and Pivot” or “V Strap” technique.

The issue of effective, efficient edge protection for our ropes and webbing was given us a bit of a challenge until our resident old man (and connoisseur of Miller Lite on his days off) , Mike S, suggested that we try and use a Sked as edge protection. It’s smooth, tough, has plenty of places to tie it off, and is much wider than standard edge protection. We’ve dubbed it Skedge Protection.

It can only be described as having worked perfectly for this situation.

I have no idea what the long term durability would be if used as edge pro all of the time, but for what we were using it for, I’ll definitely grab it without a second thought next time.

2014-03-06 11.31.20


Here is a comparison of rescues performed at different speeds. The first one is an actual rescue from down in Florida of a worker who was suspended in his fall arrest harness after the scaffolding he was on collapsed. The word from our sources who were on the scene informed us that it took 1.5 hours to perform this pickoff rescue. I was not personally there and can not speak first hand of the details, but I am told that it was a pretty straight forward scenario that just took a very long time to accomplish.


The good news is that it was successful, but had the victim been in distress, it might have been a different outcome. A pickoff should be one of the bread and butter operations of every rope team. On the scene is not the time to figure out where your attachments go to the victim, method of unweighting them from their system, etc… This should all be hammered out and drilled on well in advance.

Click here for the story and video:

http://miami.cbslocal.com/2014/02/10/scaffolding-collapse-traps-workers-in-ft-lauderdale/


The opposite end of the spectrum is this video, brought to our attention by Eric Ulner of Ropes that Rescue, of a rescue competition which includes pickoffs. These guys are FAST!!! It looks like the video is sped up, but this is just the end product of dozens of hours of disciplined practice.

While real world rescues obviously present situations you are unable to specifically PLAN for, you should always be PREPARED for what might come your way. Rescues don’t need to happen at competition speed, but that’s no excuse for taking an excessive amount of time, either.

While I’d love to start the year on a high note, this video of a rope rescue demonstration brought out the Debbie Downer in me. How many rope rescue guys does it take t screw in a light bulb? Answer: 7.  One to screw it in and 6 to point out how he could have done it better and more safely.


debbiedowner

With that in mind, I’d like to talk about the video below. There are a few things that jump out at me:

  • Firefighting gear isn’t technical rescue gear. I’d argue you are better off with the increased flexibility of your station uniform. The brim on the back of a firefighting helmet is great at keeping water and junk from falling down the back of your coat at a fire; it’s also great at hanging up on rope, railings, and everything else at a rope call.
  • While there are several examples of a worse edge transition, this one was successful, but had the potential for disaster. The mainline system was run under the fencing and the basket was placed over it. This created the potential for a pretty big drop. A belay line did not appear to be in place until the rescuer climbed over the fence.
  • There was no obvious edge protection for the main line. If the basket had dropped prior to the attachment of the belay line, it would have taken a pretty substantial fall on an unprotected edge.
  • The belay line was not along the same plane as the main line. If the belay line were to be needed, there would have been significant horizontal movement.
  • If using webbing to help lower a basket over the edge, consider wrapping a Munter (Italian) hitch around the railing rather than strong arming it.
  • A high directional would have solved most of these problems. Even just going over the fence would have helped quite a bit.  To reinforce the fence and keep it from collapsing back towards the anchor due to the resultant, a reinforcing strut could be put into place pretty quickly. Like this:

IMG_1403


http://www.youtube.com/watch?v=fuBgM29mJgo

If you’re pulling on pulleys, multiplying the power of your polyester,  performing a panoply of pick-offs, or trying to find a towel to wipe the spit off of your computer screen from reading so many “P” words in row; take a look at the videos below. They are each a description of how pulley systems work and are in order from simple concepts and explanations to a little more involved. You might know this stuff cold or it may be a good review. Either way, watching these videos is a fun and easy way to make sure all of the people on your team a staying fresh on pulley systems.

This first video is from the old Bill Nye the Science Guy show. If the opening cartoon brings you back to your youth, you can also look for “I’m Just a Bill” from Schoolhouse Rock. It must have been the same animator. Thanks to Phil Box at Rope Test Lab for posting a link to this

A little up the food chain is this classroom type demonstration from New England Rope:

Here is Pat Rhodes going over his 5 rules for a Mechanical Advantage system.

http://www.youtube.com/watch?v=4J7Qk-atJbs

This last lesson for the day is Pat explain how to stagger your compound Mechanical Advantage systems so that they collapse at the same time:

http://www.youtube.com/watch?v=LOwZe8jDiag

Enrollment is now open for our Modern Technologies in Rope Rescue. The class will be held August 24 and 25 at the Lancaster County Public Service Training Center in Lancaster County, PA at a cost of $295 per student.

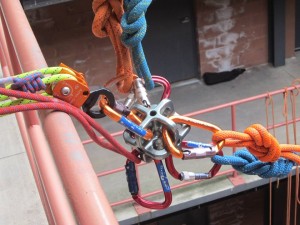
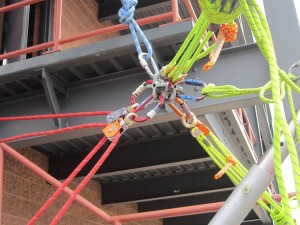
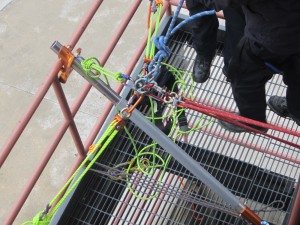
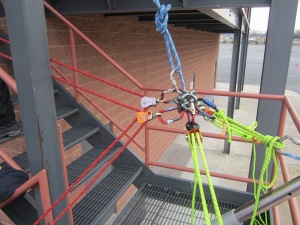
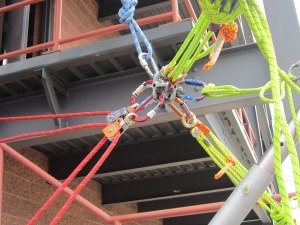
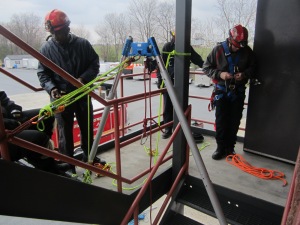
This class covers multiple versions of the bowline along with some pretty god reasons to consider them, several uses of the AZTEK kit, a thorough introduction to the Two Tension Rope System concept with the MPD, and the use of the Arizona Vortex Artificial High Directional in some pretty typical urban setup configurations as well as some Rescue 2 Training exclusive uses of it in a few of the Appalachian Doortex configurations. As you can see in the pictures below from our last class, we did a good bit of work with the Rock Exotica UFO. One particularly challenging and fun scenario was to change the direction of our main and belay lines 180 degrees on an anchor that was free floating in the middle of the stair landing. There was also some excellent use of the UFO to simplify the rigging of a Two Rope Offset.

In addition to the Arizona Vortex, Appalachian Doortex, MPD’s, UFO’s, and AZTEK’s, we’ll also have available for use in this class three new products (some not even on the market yet) from Rock Exotica:

The little brother of the UFO; the rockStar.

The Enforcer load cell; which features swivels at both ends, a digital readout, and Bluetooth transmitting capabilities!

The AZORP (Arizona Omni Rigging Pod); an add on used to increase the already amazing flexibility of the Arizona Vortex.

open enrollment August 2013

Here are some pictures from our last MTRR class; we did some heavy duty 3D rigging along with some urban AZV usage:

IMG_1408 IMG_1412 IMG_1420 IMG_1429 IMG_1432 IMG_1434 IMG_1393

This class is different each time we run it and we’ve developed new techniques each class with input and ideas from the students. If you’re interested in seeing and helping develop what’s on the cutting edge of rope rescue equipment and techniques, contact Kelly to reserve a spot in this popular class. Call 240-462-6610 or send an email to rescue-2@comcast.net

Well, after finally getting off of a 3 month ambulance rotation on “The Soulcrusher”, I’m hoping to be back in the swing of regular posts here on the website. In the vein of getting back in the swing, here are a few unique things related to ropes and swings:

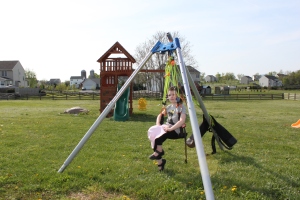
First up is the world’s most expensive swingset, probably the most portable, but you’ve got to pay for the privilege.  I try to keep my hands on rope at least once a day; since this day was so beautiful, I decided to take out the ol’ Arizona Vortex and goof around a bit. Because there is no cliff in my yard (yet), I had to settle for a flat land configuration. I used my AZV, a couple of AZTEK’s, a bosun’s chair, and a 4 year old. Here’s the result:

IMG_7122

Of a more daring nature is the rope swing as pioneered by rock climber Dan Osman. While he ultimately died doing one of these jumps, it is pretty neat to watch the cajones this guy has to be able to do this stuff. He basically sets up a highline and, with a separate rope attached mid span, takes a free fall jump perpendicular to the track line. When the separate rope he is attached to comes tight, he goes for one hell of a long swing. I guess that, with the rope stretch and moveable mid span anchor, this is greater than a FF 2. If anybody agrees or disagrees, I’d love to know.

https://www.youtube.com/watch?v=si2j6IaKQGU

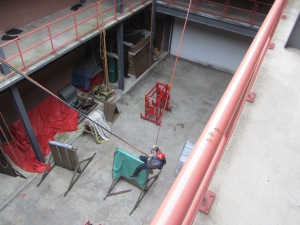
In stark contrast to Dan, I present the world’s slowest, yet safest, rope swing. Here is a shot of the rope offset that we set up in the last “Modern Technologies” class in Lancaster, PA.  We had a main and belay coming from each side and connected to a Rock Exotica UFO to help keep all of the attachment points ultra clean. A CMC MPD was used on each side to control the main lines and and i’D and Petzl ASAP used for the belay lines.

IMG_1383

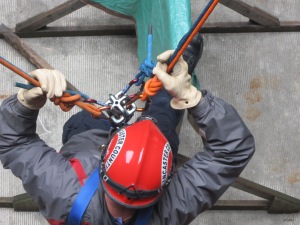
A close up of the UFO on Rick Croft’s harness:

IMG_1385

Stand by for more frequent postings again. Thanks to everyone who keeps checking in!